Hey, friends, did you expect to hide your messy bedroom or workspace during your next online meeting on Zoom? In that case, you’ll be excited to try out Zoom’s Virtual Background feature that allows you to replace your background with an image or scene.
Make sure you have the latest version of Zoom installed on your computer before you get started with this procedure. Regardless of whether you’re using Windows or macOS, the steps are going to be fairly identical.
1.Launch the Zoom desktop client on your computer.
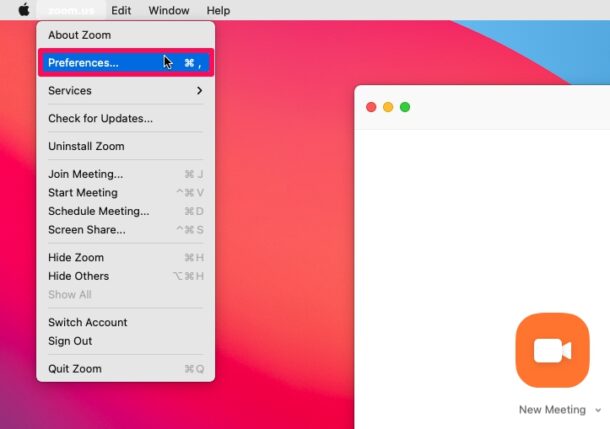
2.If you’re on Mac, click on zoom.us from the menu bar. If you’re on Windows, you can click on the gear icon in the application window to head over to settings.
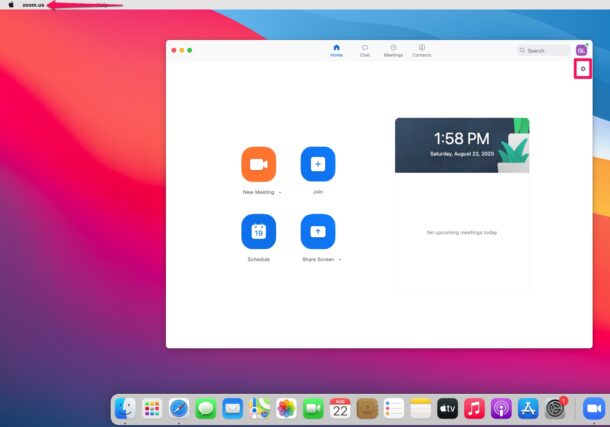
3.Choose Preferences from the dropdown menu to access Zoom’s settings.
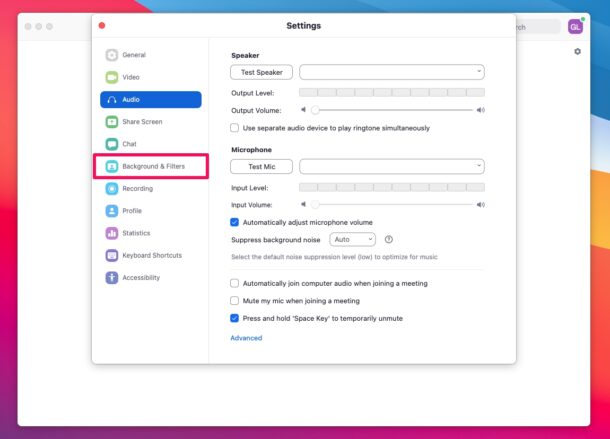
4.This will take you to the audio settings for Zoom. Choose Background & Filters from the left pane, as shown in the screenshot below.
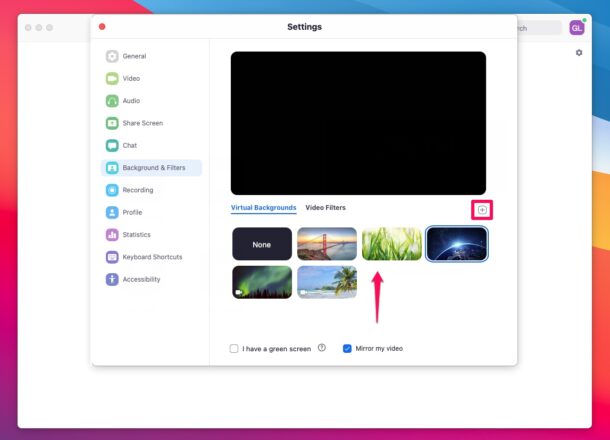
5.Here, you’ll be able to select and use any of the stock images offered by Zoom. If you want to add your own picture, click on the + icon as shown here.
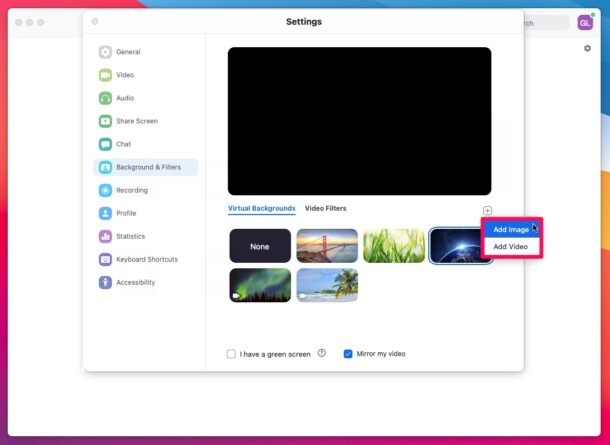
6.Now, you can choose either “Add Image” or “Add Video” and use any picture or video that’s stored on your computer as a Zoom background.
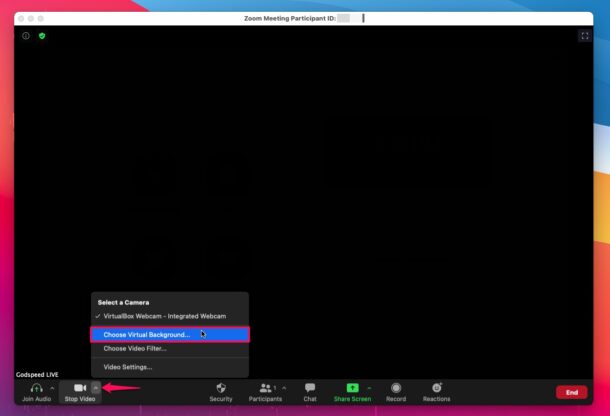
7.You can do the same while you’re in an ongoing meeting too. Click on the chevron icon next to Start/Stop Video and click on “Choose Virtual Background” to use any background of your choice or change it.
Provided you’re using a custom video as your Zoom background, it’s worth keeping in mind that maximum video resolution that can be used as a virtual background is currently limited to 1080p Full HD.
Zoom’s virtual background feature works best with a green screen and uniform lighting. It’s similar to how streamers mask their backgrounds. The green screen helps Zoom to easily detect the difference between you and your actual background. Regardless, the feature works fine as long as you’re not moving around too much, and the simpler the area behind you the better the performance will be. If you can pick a plain wall, it will generally work quite well.

