Download Fonts
Once you’re running the newest OS, head to the App Store and download the fonts you want to add. This process is tricky, as there are no official Apple fonts in the App Store. Rather, you have to search for and download third-party apps that contain fonts and font libraries.
The most obvious step is to open the search page at the App Store and run a search for the word “fonts.” That will yield a fair number of font libraries and sets. Not too many fonts and font libraries in the App Store will work with Apple’s new font manager, but you should be able to find several that are compatible.

One supported font app worth trying is Font Diner, which has one font set free for personal use, while the others will each cost $4.99 a year to use. Still, the free Silverware font set does include a healthy selection of fonts. Tap the Activate button for the font set you want, then tap Install.
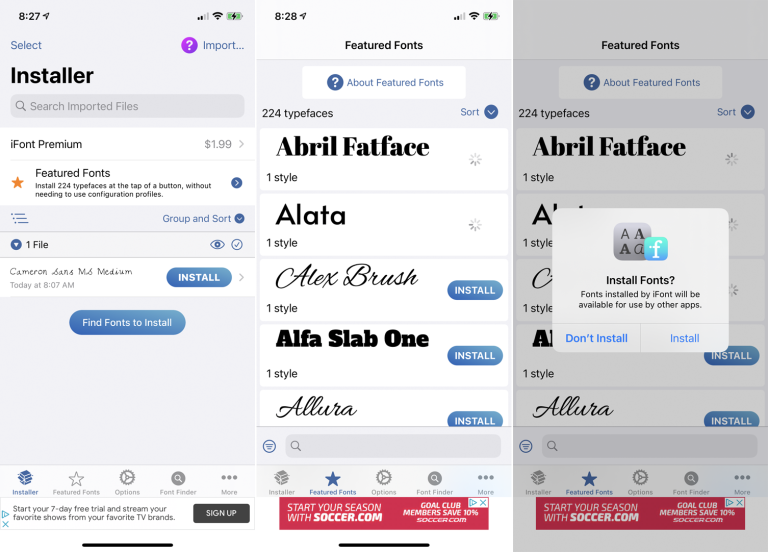
The iFont acts as the font manager while also offering its own fonts and steering you to font websites. The basic free version provides 224 different fonts.
How To Manage Fonts on iPhone and iPad
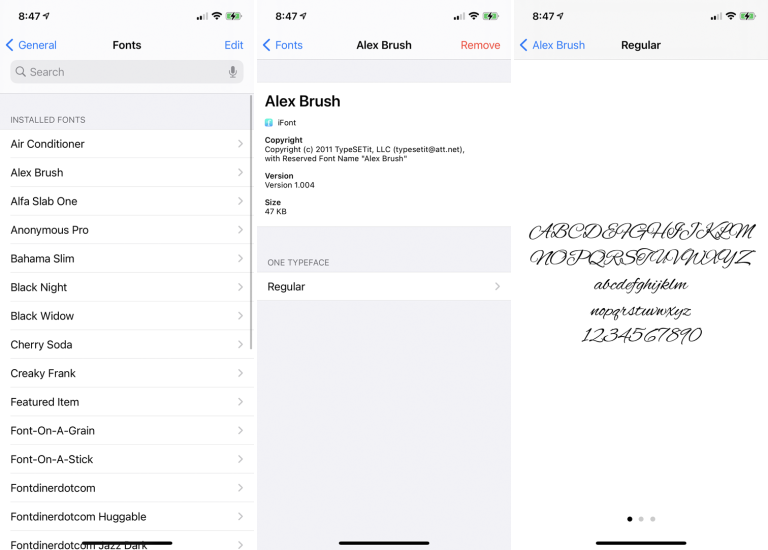
Just use the Apple device’s built-in font manager under Settings > General > Fonts, where you’ll see installed fonts from Font Diner, iFont, and any other font apps you may have downloaded and used. Tap a font and select a typeface to view a sample. Swipe to the left to see additional screens that display the font.
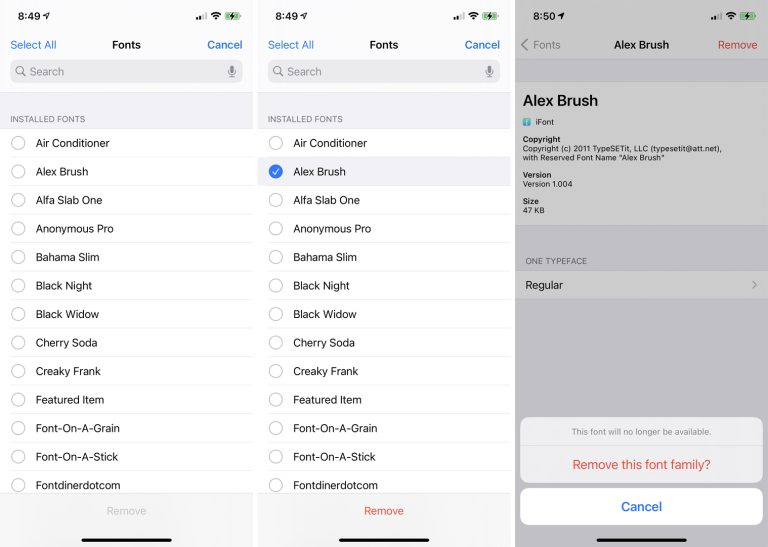
In order to get rid of the font that you don’t expect to keep, tap the Edit link at the screen of installed fonts, select the font, and then tap Remove. Alternatively, tap the name of the font and then tap Remove. Confirm the option to remove the font family.
To Change Fonts
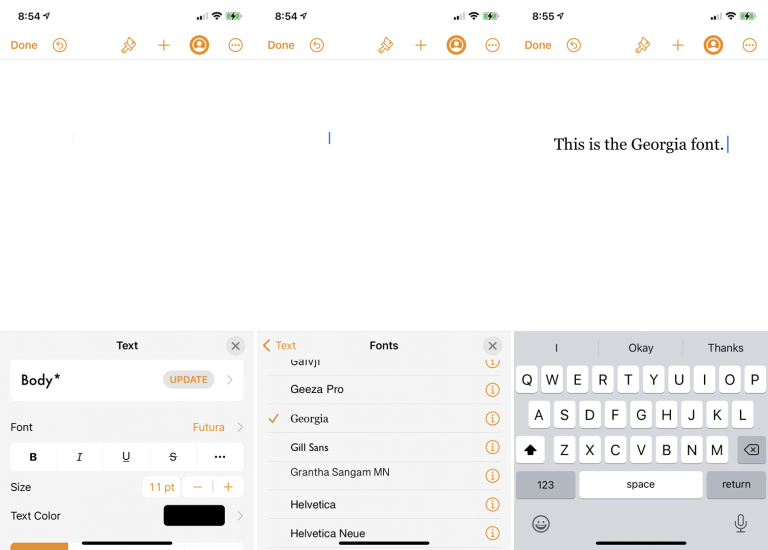
The whole point of downloading fonts is to use them with the apps you already use, but this process can be tricky. Most iOS and iPadOS apps still don’t support these types of third-party fonts, though Apple’s Pages, Numbers, and Keynote apps do work with custom fonts.
In Pages, tap the paintbrush icon at the top and select the name of the current font from the formatting pane at the bottom. Browse through the list of fonts and you should see both the built-in system fonts and the custom fonts you installed. Tap the font you want to use and then close the formatting pane. Start typing your text, and it appears in the font you selected.
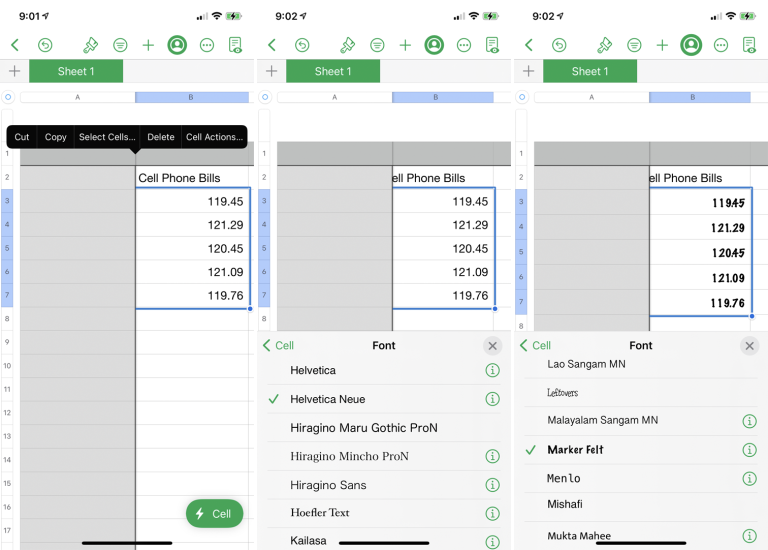
You are able to do the same if you’re working with a spreadsheet in Numbers. Select a range of cells and then tap the paintbrush icon at the top to open the formatting pane. Tap the option for Cell and tap the current font name. Scroll through the list and choose a font. Any text or numbers in the selected cells take on the new font.
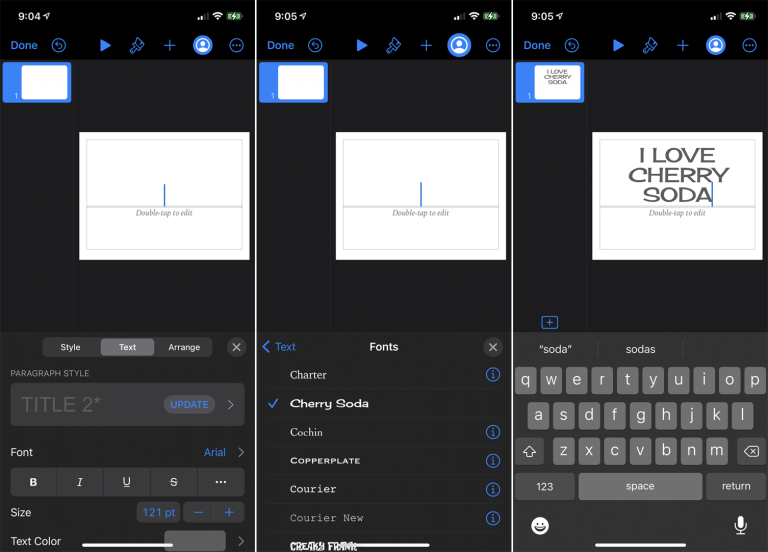
Now, if you’re working on a presentation in Keynote, tap the paintbrush icon to open the formatting pane. You can then tap the option for Text, and then select the font name. Choose a new font from the selection screen and tap the X to close the formatting pane. Now enter text into the document, and it will appear in the font you chose.


