Allow Remote Access
To access a computer remotely, it must first be set up properly. Go to Settings > System > Remote Desktop on the computer you wish to access and make sure the Enable Remote Desktop switch is turned on.
Under the default situation, the options for Keep your PC awake for connections when it is plugged in and Make my PC discoverable on private networks to enable automatic connection from a remote device may both be enabled. To view or modify either option, click the corresponding link to Show settings, but you can leave both turned on at this point.
While you’re here, note the name of the PC as you’ll need it when you set up the connection.
Remote Access Settings
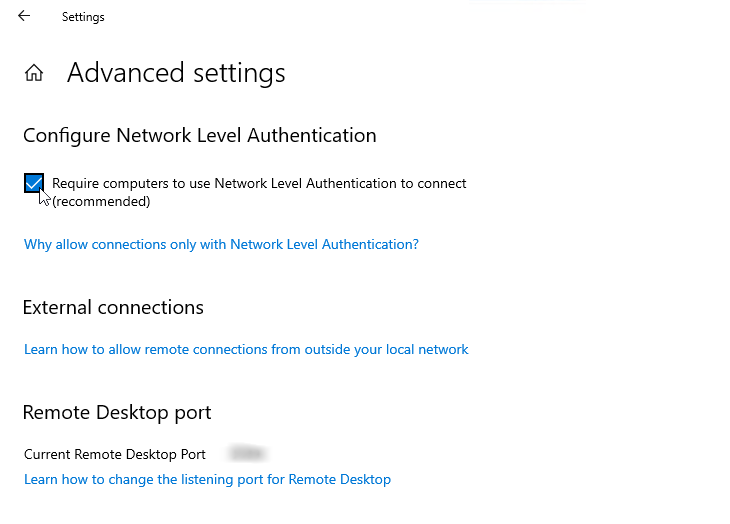
Just click the Advanced settings link and make sure the box for Configure Network Level Authentication is turned on. This feature provides an extra layer of protection to ward off uninvited guests and malicious users.
Provided you’ll be connecting to the computer on the same network via a VPN or other means, ignore the section for External connections. The section for Remote Desktop port shows the default port to listen for and accept a remote connection.
Sign in Remotely
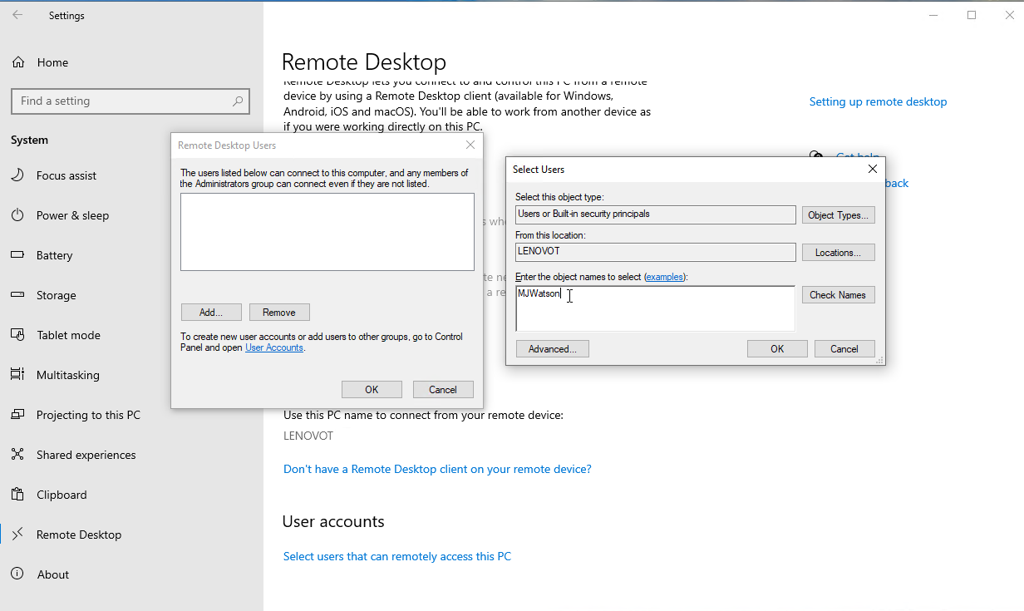
As the default, any user who has an administrative account on the remote PC can access it. Assuming you’re using a Microsoft Account or company account to sign into Windows, your best bet is to use that account to sign in remotely.
If you expect to give remote access to a different account, click the link at the bottom for Select users that can remotely access this PC. Click Add and enter the user name for the account you want to use.
Set Up Remote Access From iPhone or iPad
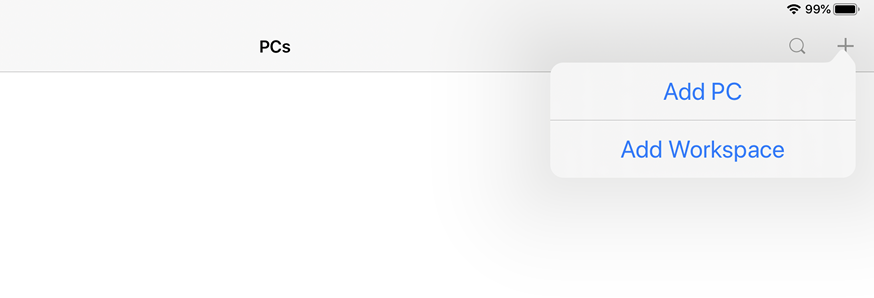
Currently, you are able to turn to your mobile device. To access the computer from your iPhone, iPad, or iPod touch, download and install the Remote Desktop app from Apple’s App Store. Open the app, tap the plus (+) symbol, and choose the option to Add PC.
Add Remote Desktop on iOS
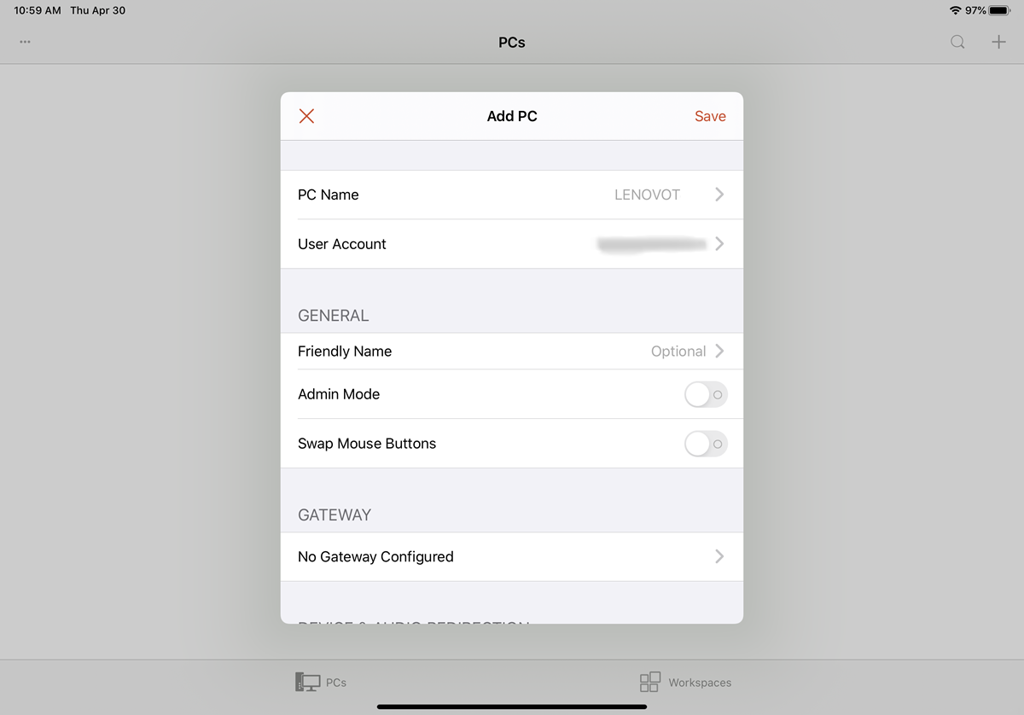
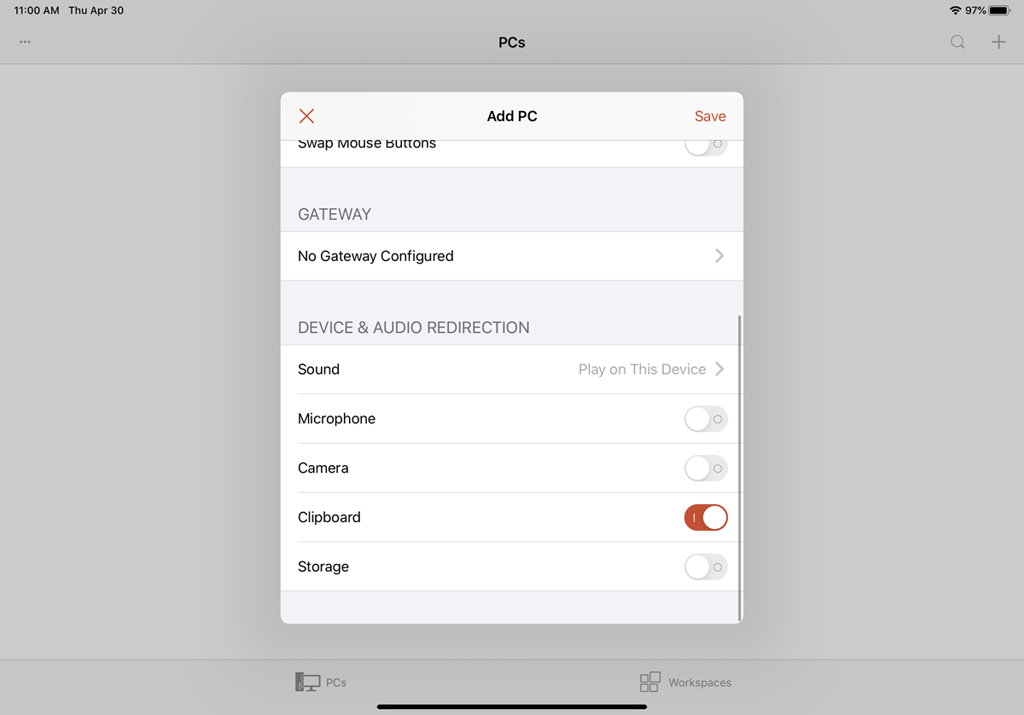
At the Add PC window, input computer name or IP address in the PC Name field. Type the account name you want to use in the User Account field, or leave the field set to Ask When Required if you’d rather enter the name each time for security reasons.
By the General section, type a name in the field for Friendly Name to add a more convenient label for this connection. Turning on the switch for Admin Mode connects you to a console session to manage a Windows server; normally you would leave this turned off. The option for Swap Mouse Buttons swaps the left and right mouse buttons.
In the Gateway section, you would need to enable and set up the option for Gateway only if your organization uses a Remote Desktop Gateway to secure remote connections.
Configure Session Features
Swipe down to the Device & Audio Redirection section to enable any features on your iOS device that you wish to use during a remote connection. You’d likely want to direct the sound to play on this device. You may also want to enable the Clipboard if you plan to copy and paste back and forth. You can also enable the microphone, camera, and remote storage. When finished, tap Save in the upper-right corner.
Connect to Remote PC on iOS
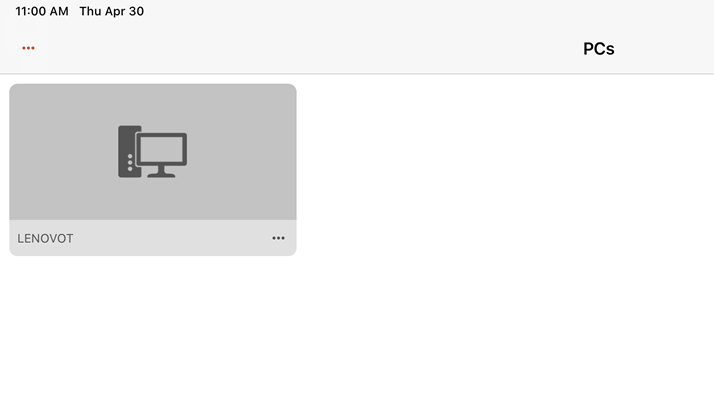
The PC you want to access will be displayed in this application. Just tap the name and icon of the computer connection you just set up. The first time you try to access the computer, Remote Desktop may ask to verify the connection to that computer.
Remote Connection Toolbar for iOS
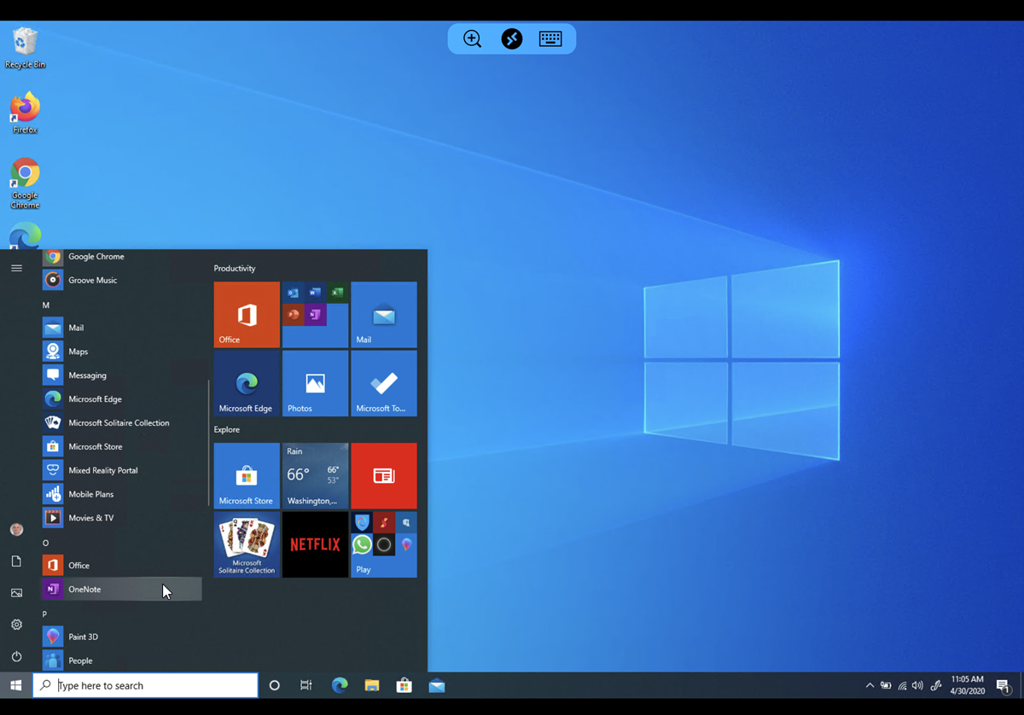
You shall then be connected to the remote computer. You can now open apps and windows, manage the desktop, and do just about everything you can do if you were sitting in front of the computer.
To help you control your remote session, the app displays a small toolbar at the top. Tap the magnifying glass icon to zoom in on the screen. Tap it again to zoom back out. Tap the keyboard icon to display your device’s keyboard.
Manage Remote Connections
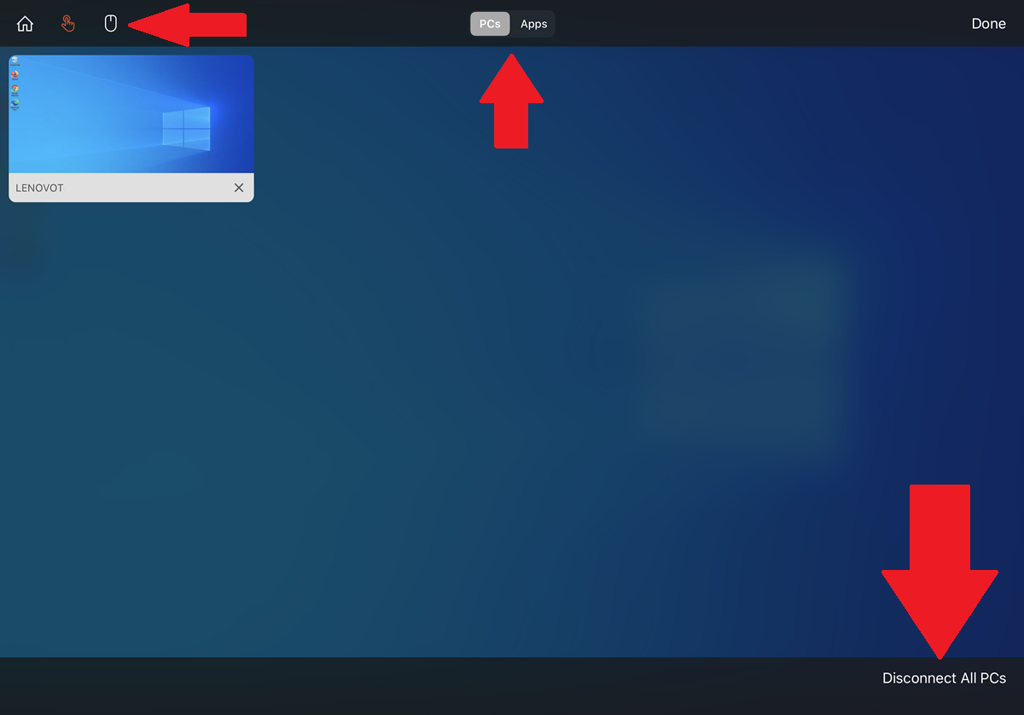
Tap the middle icon to view all your remote connections. Tap on a different remote connection to jump to another session. This page has its own toolbar at the top. Tap the Home icon to return to the home screen, where you can set up or access another connection. Tap the Hand icon to switch to touch-screen mode and tap the Mouse icon to switch to mouse mode.
Tap the X button in the thumbnail to sever the connection for that session. Otherwise, tap Disconnect All PCs to end every current session.

Set Up Remote Access From an Android Phone
Remote Desktop for Android works similarly to its iOS counterpart, though the setup process differs somewhat. Download and install the app from Google Play. After you launch the app, tap the plus (+) icon and choose Desktop.
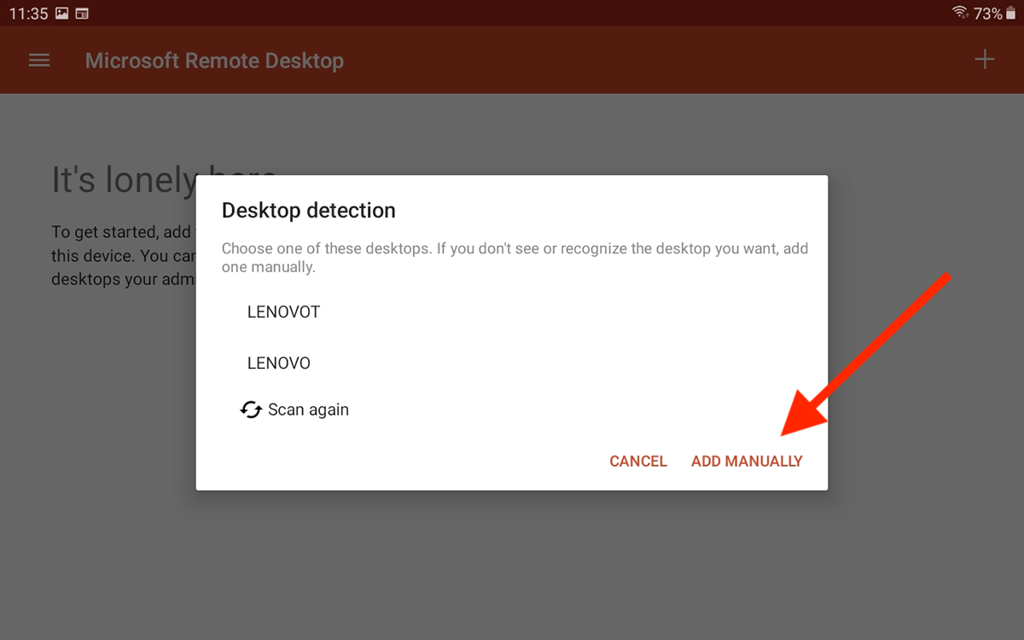
Add Remote Desktop on Android
If you happen to be near the remote computer, the app will scan for it at this point. If the PC is detected, its name will show up on the screen. Otherwise, tap the Add Manually link.
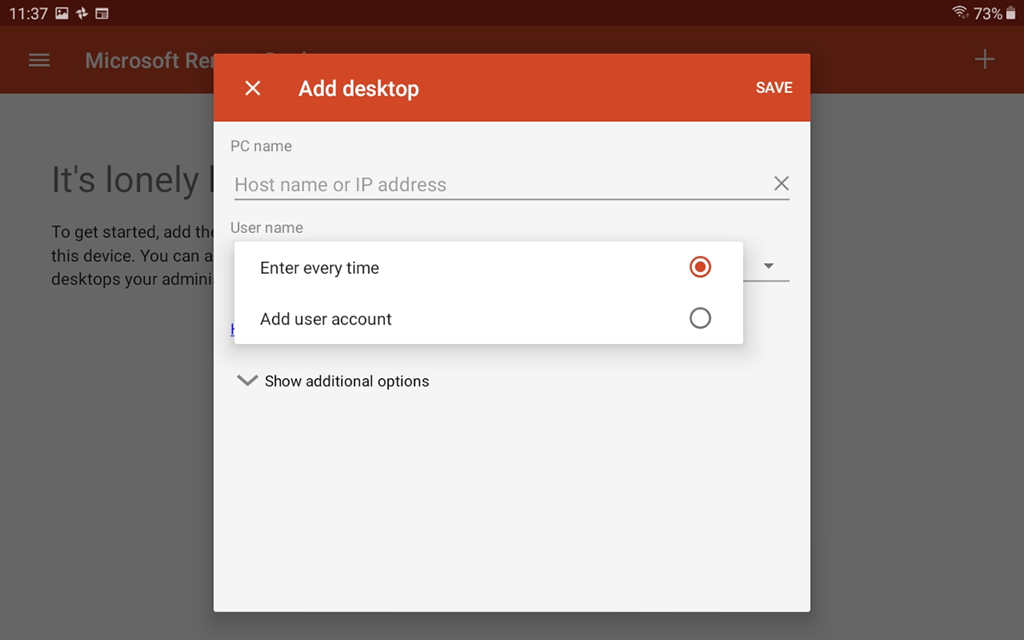
Set Up Remote Connection
At the window for Add desktop, type the computer name or IP address. For User name, tap the field that says Enter every time and then either leave that option as is or tap the setting to Add user account and type the username and password.
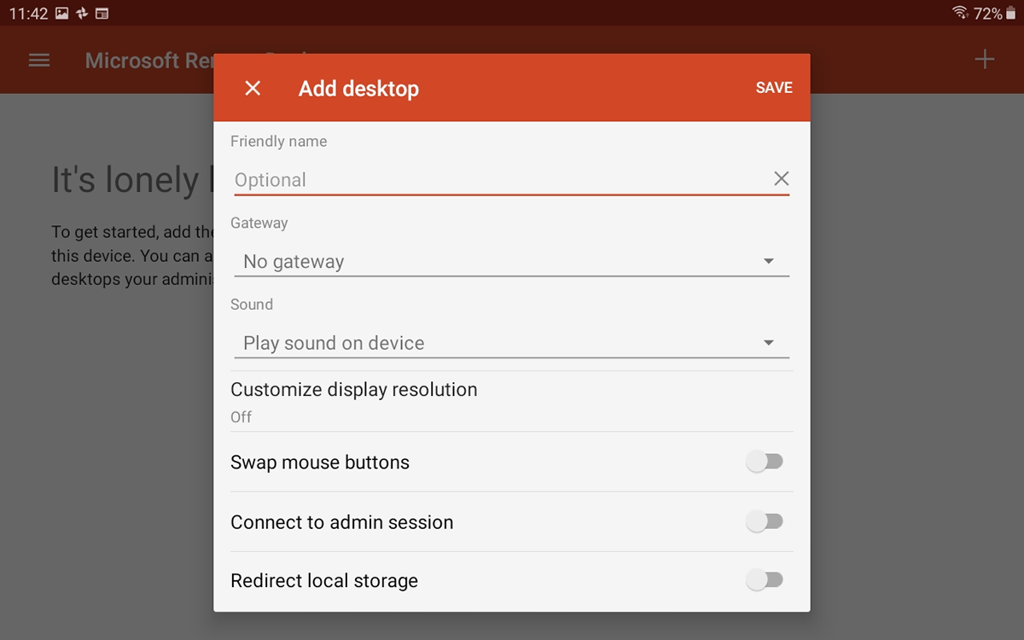
Configure Remote Desktop
Tap Show additional options, then enter a friendly name if desired. Add the gateway if your organization uses a Remote Desktop Gateway. Opt to play sound from the remote PC on your device. Unless you need to adjust the options for display resolution, mouse buttons, admin session, and local storage, you can leave those turned off. When done, click Save.

Connect to Remote PC on Android
Tap the name and icon for the remote session you just created. If you receive the message that the certificate can’t be verified, check the box to Never ask again for connections to this PC and then tap Connect.
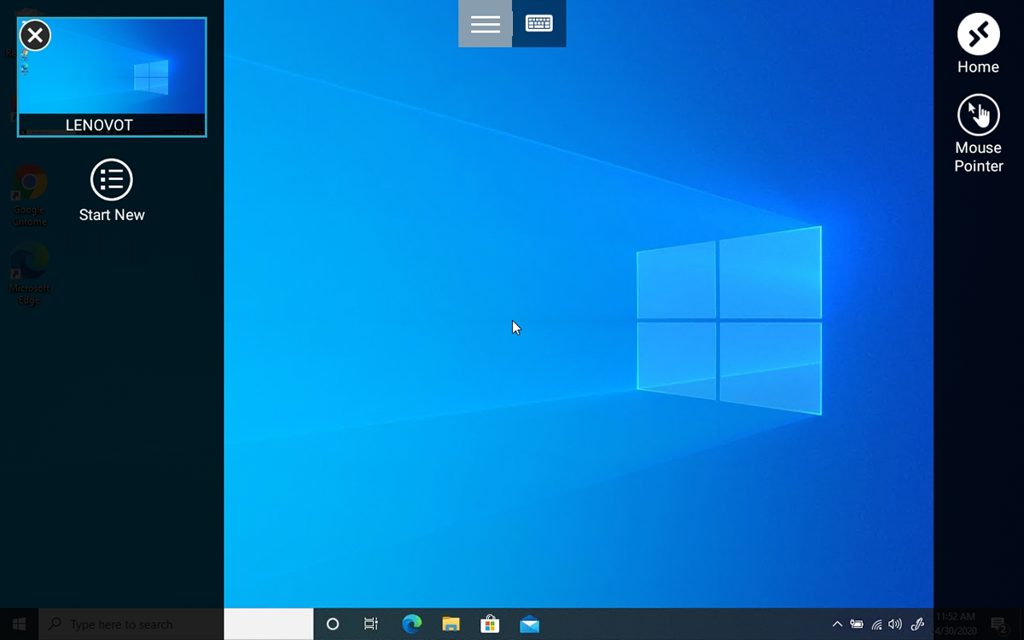
Remote Connection Toolbar for Android
You’re now connected. Tap the keyboard icon on the top toolbar to display the onscreen keyboard. Tap the hamburger icon to display the sidebars.
From there, you can tap the Start New icon to start another remote session to a different computer. Tap the Home button to return to the app’s home screen. Hit the Mouse Pointer icon to display a mouse pointer.

